Step-by-step Beginners’ Guide Installing Ubuntu 12.04 LTS
0This tutorial will show you how to install Ubuntu desktop on your machine step by step. I’ll use Ubuntu 12.04
STEP 1 : Requirements for Installing Ubuntu
AMD
Athlon64, Athlon FX, Athlon X2, Phenom, Semprons that use AM2/AM2+/AM3 socket, Turion64
Intel
F and 5×1 series Pentium 4 using the “Prescott” core
- Pentium D
- Core 2 (Solo, Duo & Quad)
- Core i3 (all)
- Core i5 (all)
- Core i7 (all)
- VIA
- Isiah
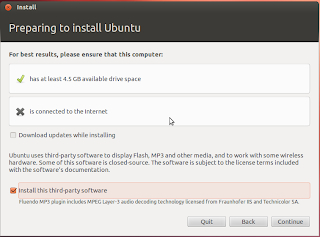
STEP 3 : Choose your language and click “Install Ubuntu” on previous screen. You’ll see this “Preparing to install Ubuntu” window. If you have internet connected, you can check “Downloads update while installing” and “install this third-part software” but it will take more time. You can just skip them and click Continue.
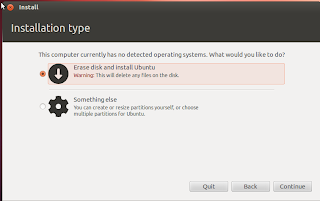
STEP 4 : At this step, you have two choices:
- One is erase all data on your device and install only Ubuntu system on it.
- Another is “something else”, manually edit, create partitions for Ubuntu
Choose the first one if you only would like a single Ubuntu system on your disk, or choose the “something else”.
STEP 5 : Assume that you chose the “Something else” option. You will see this window:
In the list /dev/sda is my hard drive. If you have other drives, it will be shown as /dev/sdb, /dev/sdc, and so on.
Partitions and free space are shown under drive as:
- /dev/sda1 #first partition of first drive
- /dev/sda2 #second partition of first drive
- free space #free space
If there isn’t a partition table under the drive, click “New Partition Table”, then highlight “free space”, click Add to add a partition for Ubuntu:
Also create a swap partition. If you’re installing Ubuntu on a laptop with high RAM and would like be able to hibernate the computer, set the swap size as much as RAM.
Finally, you will get your partition table look like this. In this case Ubuntu will be installed on ticked/dev/sda1 partition.
Note : under “Device for boot loader installation”:
- if you choose dev/sda, it will use Grub (Ubuntu’s boot loader) to load all systems on this hard drive.
- If you choose dev/sda1, Ubuntu need to be manually added to drive’s boot loader after installation. (for example, you previously have Windows installed on another partition of this drive, you’ll need manually add Ubuntu into mbr)
STEP 6 : Click Install Now on previous screen, and start configuring location, keyboard layout, and user info.
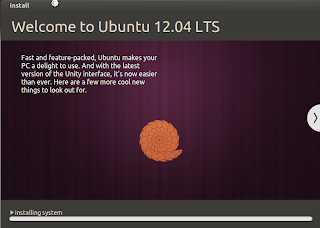
Finally, it starts copying files and installing Ubuntu. This will take a few minutes:
Step 7 : Once installation finish, click restart:
Ubuntu login screen:
Enjoy ......


0 comments: